LNMP(Linux Nginx MySQL PHP)由作为开发环境的 Linux 操作系统、作为 Web 服务器的 Nginx、作为 DB(数据库)系统的 MySQL 关系数据库管理系统 (RDBMS) 和作为服务器端(后端)编程语言的 PHP 编程语言组成。
LNMP 被用作 Web 开发领域的开源技术堆栈解决方案。此堆栈的 Windows 版本称为 WNMP (Windows Nginx MySQL PHP)
Section 12.1: 在 Arch Linux 环境安装 LNMP
通过这一行,我们将一步安装所有必要的软件包,以及最后一次更新的最新版本:
[root@archlinux ~]# pacman -Syu nginx-mainline php-fpm mariadb
:: 正在同步软件包数据库...
 core                             116.6 KiB  71.7 KiB/s 00:02 [##################################] 100%
 extra                              7.5 MiB  1004 KiB/s 00:08 [##################################] 100%
:: 正在进行全面系统更新...
正在解析依赖关系...
正在查找软件包冲突...

软件包 (25) curl-8.11.0-2  geoip-1.6.12-3  geoip-database-20240720-1  gpgme-1.24.0-1
            gst-plugins-bad-libs-1.24.9-2  gst-plugins-base-1.24.9-2  gst-plugins-base-libs-1.24.9-2
            gst-plugins-good-1.24.9-2  gstreamer-1.24.9-2  harfbuzz-10.1.0-1  harfbuzz-icu-10.1.0-1
            hwdata-0.389-1  jemalloc-1:5.3.0-4  liburing-2.8-1  libzip-1.11.1-1  mailcap-2.1.54-2
            mariadb-clients-11.5.2-1  mariadb-libs-11.5.2-1  oniguruma-6.9.9-1  php-8.3.13-1
            pixman-0.44.0-1  xfce4-weather-plugin-0.11.3-1  mariadb-11.5.2-1  nginx-mainline-1.27.2-1
            php-fpm-8.3.13-1

下载大小:       63.20 MiB
全部安装大小:  369.41 MiB
净更新大小:    304.83 MiB

:: 进行安装吗? [Y/n] Y
:: 正在获取软件包......
 mariadb-11.5.2-1-x86_64           27.2 MiB  1548 KiB/s 00:18 [##################################] 100%
 mariadb-libs-11.5.2-1-x86_64       5.4 MiB  1378 KiB/s 00:04 [##################################] 100%
 php-8.3.13-1-x86_64                4.4 MiB  1466 KiB/s 00:03 [##################################] 100%
 geoip-database-20240720-1-any      3.7 MiB  1330 KiB/s 00:03 [##################################] 100%
 php-fpm-8.3.13-1-x86_64            2.9 MiB  1380 KiB/s 00:02 [##################################] 100%
 gst-plugins-bad-libs-1.24.9...     2.6 MiB  1243 KiB/s 00:02 [##################################] 100%
 xfce4-weather-plugin-0.11.3...     2.3 MiB   875 KiB/s 00:03 [##################################] 100%
 gst-plugins-base-libs-1.24....     2.2 MiB   562 KiB/s 00:04 [##################################] 100%
 gst-plugins-good-1.24.9-2-x...     2.2 MiB   397 KiB/s 00:06 [##################################] 100%
 gstreamer-1.24.9-2-x86_64       2028.3 KiB   392 KiB/s 00:05 [##################################] 100%
 mariadb-clients-11.5.2-1-x86_64 1803.4 KiB   403 KiB/s 00:04 [##################################] 100%
 hwdata-0.389-1-any              1645.2 KiB   333 KiB/s 00:05 [##################################] 100%
 curl-8.11.0-2-x86_64            1136.8 KiB   372 KiB/s 00:03 [##################################] 100%
 harfbuzz-10.1.0-1-x86_64        1090.6 KiB   331 KiB/s 00:03 [##################################] 100%
 nginx-mainline-1.27.2-1-x86_64   658.8 KiB   255 KiB/s 00:03 [##################################] 100%
 gpgme-1.24.0-1-x86_64            462.2 KiB   160 KiB/s 00:03 [##################################] 100%
 jemalloc-1:5.3.0-4-x86_64        425.3 KiB   302 KiB/s 00:01 [##################################] 100%
 gst-plugins-base-1.24.9-2-x...   307.2 KiB   326 KiB/s 00:01 [##################################] 100%
 pixman-0.44.0-1-x86_64           270.0 KiB   229 KiB/s 00:01 [##################################] 100%
 libzip-1.11.1-1-x86_64           249.8 KiB   265 KiB/s 00:01 [##################################] 100%
 oniguruma-6.9.9-1-x86_64         220.1 KiB   309 KiB/s 00:01 [##################################] 100%
 liburing-2.8-1-x86_64            189.4 KiB  71.5 KiB/s 00:03 [##################################] 100%
 geoip-1.6.12-3-x86_64             80.1 KiB   169 KiB/s 00:00 [##################################] 100%
 mailcap-2.1.54-2-any              29.5 KiB   125 KiB/s 00:00 [##################################] 100%
 harfbuzz-icu-10.1.0-1-x86_64       7.9 KiB  33.3 KiB/s 00:00 [##################################] 100%
 全部 (25/25)                      63.2 MiB   756 KiB/s 01:26 [##################################] 100%
(25/25) 正在检查密钥环里的密钥                                [##################################] 100%
(25/25) 正在检查软件包完整性                                  [##################################] 100%
(25/25) 正在加载软件包文件                                    [##################################] 100%
(25/25) 正在检查文件冲突                                      [##################################] 100%
(25/25) 正在检查可用存储空间                                  [##################################] 100%
:: 正在处理软件包的变化...
( 1/25) 正在安装 geoip-database                               [##################################] 100%
:: By installing geoip-database, you acknowledge and agree to comply
   with the terms of the GeoLite2 End User License Agreement (EULA).

   Review the EULA here: https://www.maxmind.com/en/geolite2/eula
( 2/25) 正在安装 geoip                                        [##################################] 100%
geoip 的可选依赖
    geoip-database-extra: city/ASN databases (not needed for country lookups)
( 3/25) 正在安装 mailcap                                      [##################################] 100%
( 4/25) 正在安装 nginx-mainline                               [##################################] 100%
( 5/25) 正在更新 curl                                         [##################################] 100%
( 6/25) 正在安装 libzip                                       [##################################] 100%
( 7/25) 正在安装 oniguruma                                    [##################################] 100%
( 8/25) 正在安装 php                                          [##################################] 100%
( 9/25) 正在更新 hwdata                                       [##################################] 100%
(10/25) 正在安装 php-fpm                                      [##################################] 100%
(11/25) 正在安装 liburing                                     [##################################] 100%
(12/25) 正在安装 mariadb-libs                                 [##################################] 100%
mariadb-libs 的可选依赖
    krb5: for gssapi authentication [已安装]
(13/25) 正在安装 jemalloc                                     [##################################] 100%
jemalloc 的可选依赖
    perl: for jeprof [已安装]
(14/25) 正在安装 mariadb-clients                              [##################################] 100%
(15/25) 正在安装 mariadb                                      [##################################] 100%
:: You need to initialize the MariaDB data directory prior to starting
   the service. This can be done with mariadb-install-db command, e.g.:
     # mariadb-install-db --user=mysql --basedir=/usr --datadir=/var/lib/mysql
mariadb 的可选依赖
    cracklib: for cracklib plugin
    curl: for ha_s3 plugin [已安装]
    galera: for MariaDB cluster with Galera WSREP
    judy: for Open Query GRAPH (OQGraph) computation engine
    perl-dbd-mariadb: for mariadb-hotcopy, mariadb-convert-table-format and mariadb-setpermission
    python-mysqlclient: for myrocks_hotbackup
    xz: lzma provider [已安装]
(16/25) 正在更新 gpgme                                        [##################################] 100%
(17/25) 正在更新 gstreamer                                    [##################################] 100%
(18/25) 正在更新 gst-plugins-base-libs                        [##################################] 100%
(19/25) 正在更新 gst-plugins-bad-libs                         [##################################] 100%
(20/25) 正在更新 pixman                                       [##################################] 100%
(21/25) 正在更新 harfbuzz                                     [##################################] 100%
(22/25) 正在更新 gst-plugins-base                             [##################################] 100%
(23/25) 正在更新 gst-plugins-good                             [##################################] 100%
(24/25) 正在更新 harfbuzz-icu                                 [##################################] 100%
(25/25) 正在更新 xfce4-weather-plugin                         [##################################] 100%
:: 正在运行事务后钩子函数...
(1/6) Creating system user accounts...
Creating group 'mysql' with GID 968.
Creating user 'mysql' (MariaDB) with UID 968 and GID 968.
(2/6) Reloading system manager configuration...
(3/6) Creating temporary files...
(4/6) Arming ConditionNeedsUpdate...
(5/6) Updating icon theme caches...
(6/6) Updating the info directory file...
Nginx
启动Nginx并测试访问
[root@archlinux ~]# systemctl start nginx
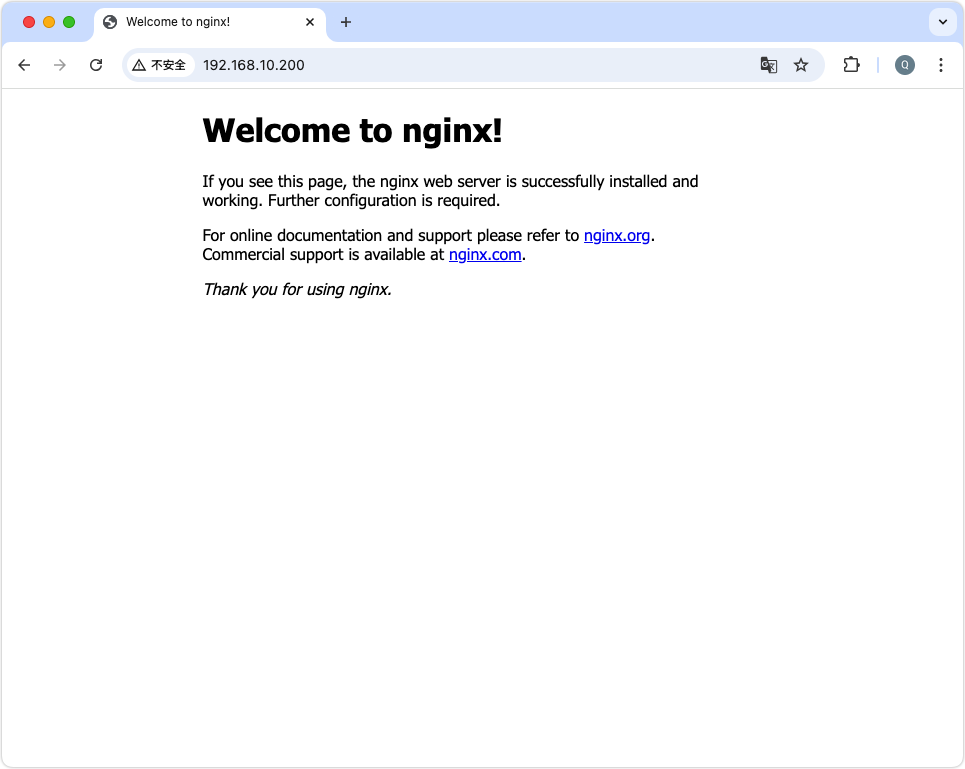
使用systemctl status nginx查看nginx的服务状态,如果有下面的警告提示
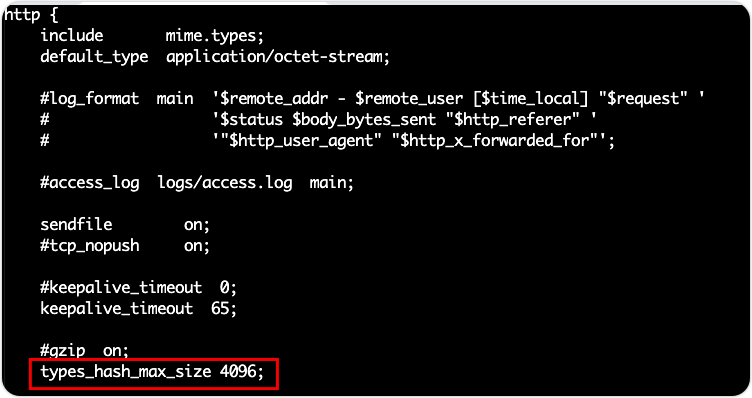
[warn] 1723#1723: could not build optimal types_hash, you should increase either types_hash_max_size: 1024 or types_hash_bucket_size: 64; ignoring types_hash_bucket_size
则需要修改/etc/nginx/nginx.conf配置文件中,在 http 块中添加 types_hash_max_size 4096; 。systemctl restart nginx 重启 nginx 就可以解决这个告警的提示。
PHP
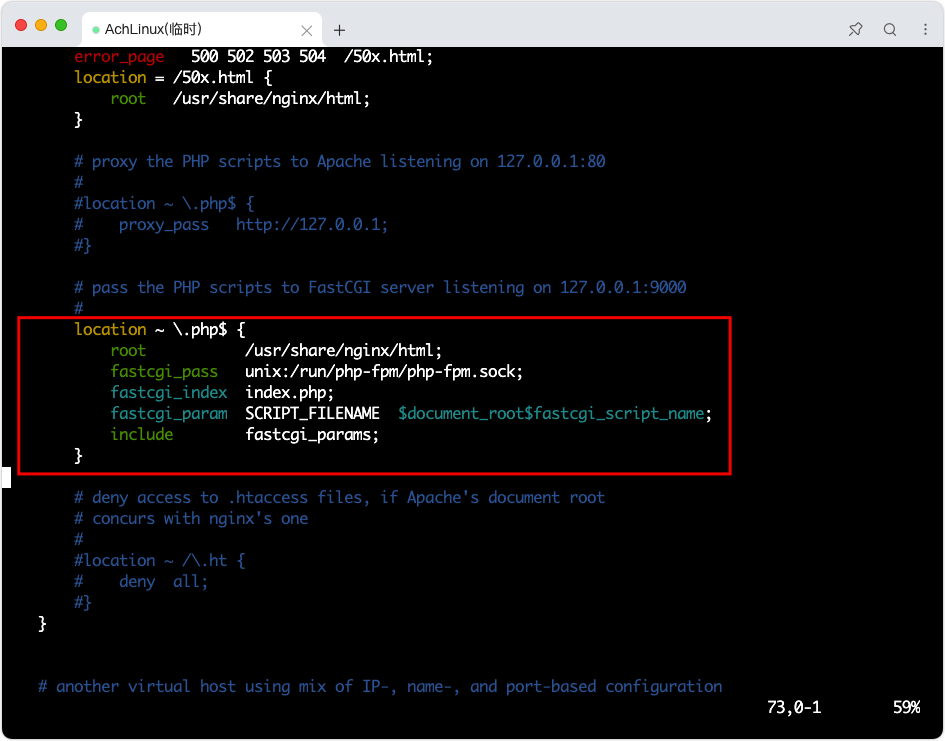
上面的安装命令虽然只有php-fpm,但是在安装的过程中,会把 php 也一并安装好,现在需要做的是在 nginx 中开启和 php-fpm 的对接工作,编辑 /etc/nginx/nginx.conf 文件。对下面的内容进行修改
        #location ~ \.php$ {
        #    root           html;
        #    fastcgi_pass   127.0.0.1:9000;
        #    fastcgi_index  index.php;
        #    fastcgi_param  SCRIPT_FILENAME  /scripts$fastcgi_script_name;
        #    include        fastcgi_params;
        #}
取消注释,并做下面的改动,需要修改的有下面几个点,第一个是关于根目录,
        location ~ \.php$ {
            root           /usr/share/nginx/html;
            fastcgi_pass   unix:/run/php-fpm/php-fpm.sock;
            fastcgi_index  index.php;
            fastcgi_param  SCRIPT_FILENAME  $document_root$fastcgi_script_name;
            include        fastcgi_params;
        }
配置完成后启动php-fpm和重启nginx
[root@archlinux ~]# nginx -t
nginx: the configuration file /etc/nginx/nginx.conf syntax is ok
nginx: configuration file /etc/nginx/nginx.conf test is successful
[root@archlinux ~]# systemctl enable php-fpm
Created symlink '/etc/systemd/system/multi-user.target.wants/php-fpm.service' → '/usr/lib/systemd/system/php-fpm.service'.
[root@archlinux ~]# systemctl start php-fpm
[root@archlinux ~]# systemctl restart nginx
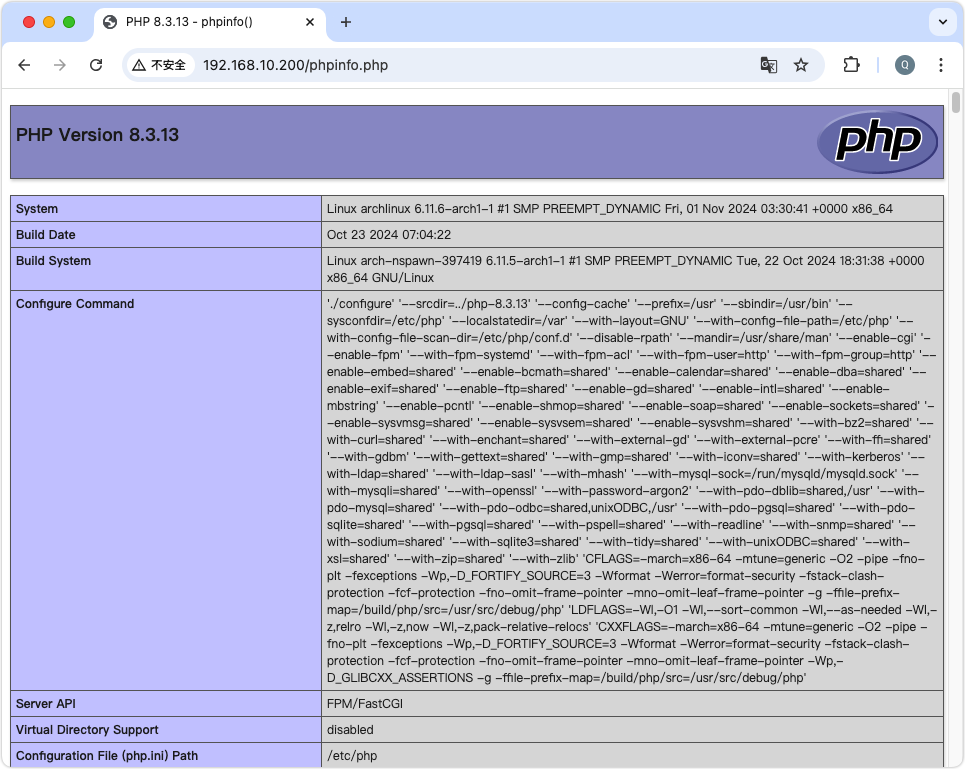
创建一个php探针文件
[root@archlinux ~]# echo "<?php phpinfo(); ?>" > /usr/share/nginx/html/phpinfo.php
浏览器访问该页面,如果出现下面的结果,就是php和nginx的关联成功
MySQL
安装前,先在php中配置mysql的扩展功能功能,打开/etc/php/php.ini文件,找到下面的两项内容:
;extension=mysqli
;extension=pdo_mysql
取消它们的注释,也就是删除前面的;,结果如下:
extension=mysqli
extension=pdo_mysql
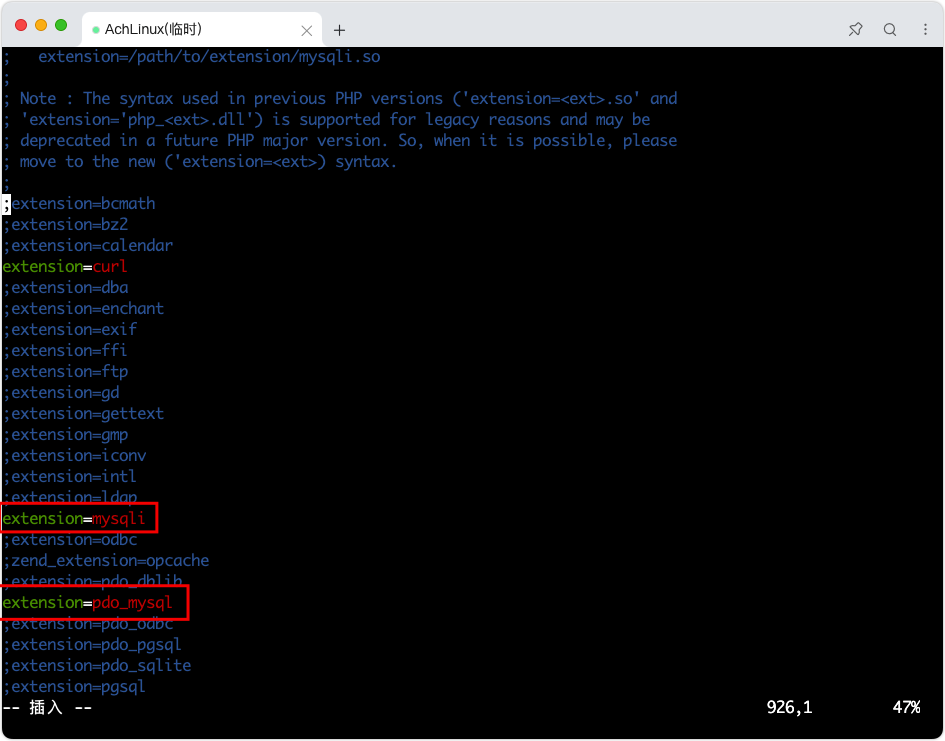
初始化mysql的数据目录,这里面的/var/lib/mysql 就是数据目录,可以修改为其他的位置。
[root@archlinux html]# mysql_install_db --user=mysql --basedir=/usr --datadir=/var/lib/mysql
/usr/bin/mysql_install_db: Deprecated program name. It will be removed in a future release, use 'mariadb-install-db' instead
Installing MariaDB/MySQL system tables in '/var/lib/mysql' ...
OK

To start mariadbd at boot time you have to copy
support-files/mariadb.service to the right place for your system


Two all-privilege accounts were created.
One is root@localhost, it has no password, but you need to
be system 'root' user to connect. Use, for example, sudo mysql
The second is mysql@localhost, it has no password either, but
you need to be the system 'mysql' user to connect.
After connecting you can set the password, if you would need to be
able to connect as any of these users with a password and without sudo

See the MariaDB Knowledgebase at https://mariadb.com/kb

You can start the MariaDB daemon with:
cd '/usr' ; /usr/bin/mariadbd-safe --datadir='/var/lib/mysql'

You can test the MariaDB daemon with mariadb-test-run.pl
cd '/usr/mariadb-test' ; perl mariadb-test-run.pl

Please report any problems at https://mariadb.org/jira

The latest information about MariaDB is available at https://mariadb.org/.

Consider joining MariaDB's strong and vibrant community:
https://mariadb.org/get-involved/
启动mysql服务
[root@archlinux html]# systemctl enable mysqld
Created symlink '/etc/systemd/system/multi-user.target.wants/mariadb.service' → '/usr/lib/systemd/system/mariadb.service'.
[root@archlinux html]# systemctl start mysqld
运行安全配置的脚本,根据实际的需求完成各项配置的修改:
[root@archlinux html]# mysql_secure_installation
/usr/bin/mysql_secure_installation: Deprecated program name. It will be removed in a future release, use 'mariadb-secure-installation' instead

NOTE: RUNNING ALL PARTS OF THIS SCRIPT IS RECOMMENDED FOR ALL MariaDB
      SERVERS IN PRODUCTION USE!  PLEASE READ EACH STEP CAREFULLY!

In order to log into MariaDB to secure it, we'll need the current
password for the root user. If you've just installed MariaDB, and
haven't set the root password yet, you should just press enter here.

Enter current password for root (enter for none):
OK, successfully used password, moving on...

Setting the root password or using the unix_socket ensures that nobody
can log into the MariaDB root user without the proper authorisation.

You already have your root account protected, so you can safely answer 'n'.

Switch to unix_socket authentication [Y/n]
Enabled successfully!
Reloading privilege tables..
 ... Success!


You already have your root account protected, so you can safely answer 'n'.

Change the root password? [Y/n]
New password:
Re-enter new password:
Password updated successfully!
Reloading privilege tables..
 ... Success!


By default, a MariaDB installation has an anonymous user, allowing anyone
to log into MariaDB without having to have a user account created for
them.  This is intended only for testing, and to make the installation
go a bit smoother.  You should remove them before moving into a
production environment.

Remove anonymous users? [Y/n]
 ... Success!

Normally, root should only be allowed to connect from 'localhost'.  This
ensures that someone cannot guess at the root password from the network.

Disallow root login remotely? [Y/n] n
 ... skipping.

By default, MariaDB comes with a database named 'test' that anyone can
access.  This is also intended only for testing, and should be removed
before moving into a production environment.

Remove test database and access to it? [Y/n]
 - Dropping test database...
 ... Success!
 - Removing privileges on test database...
 ... Success!

Reloading the privilege tables will ensure that all changes made so far
will take effect immediately.

Reload privilege tables now? [Y/n]
 ... Success!

Cleaning up...

All done!  If you've completed all of the above steps, your MariaDB
installation should now be secure.

Thanks for using MariaDB!
使用上面的步骤中新修改的密码,测试登录mysql,如果和下面的情况类似,则证明mysql安装成功。
[root@archlinux html]# mysql -uroot -p
mysql: Deprecated program name. It will be removed in a future release, use '/usr/bin/mariadb' instead
Enter password:
Welcome to the MariaDB monitor.  Commands end with ; or \g.
Your MariaDB connection id is 12
Server version: 11.5.2-MariaDB Arch Linux

Copyright (c) 2000, 2018, Oracle, MariaDB Corporation Ab and others.

Type 'help;' or '\h' for help. Type '\c' to clear the current input statement.

MariaDB [(none)]>
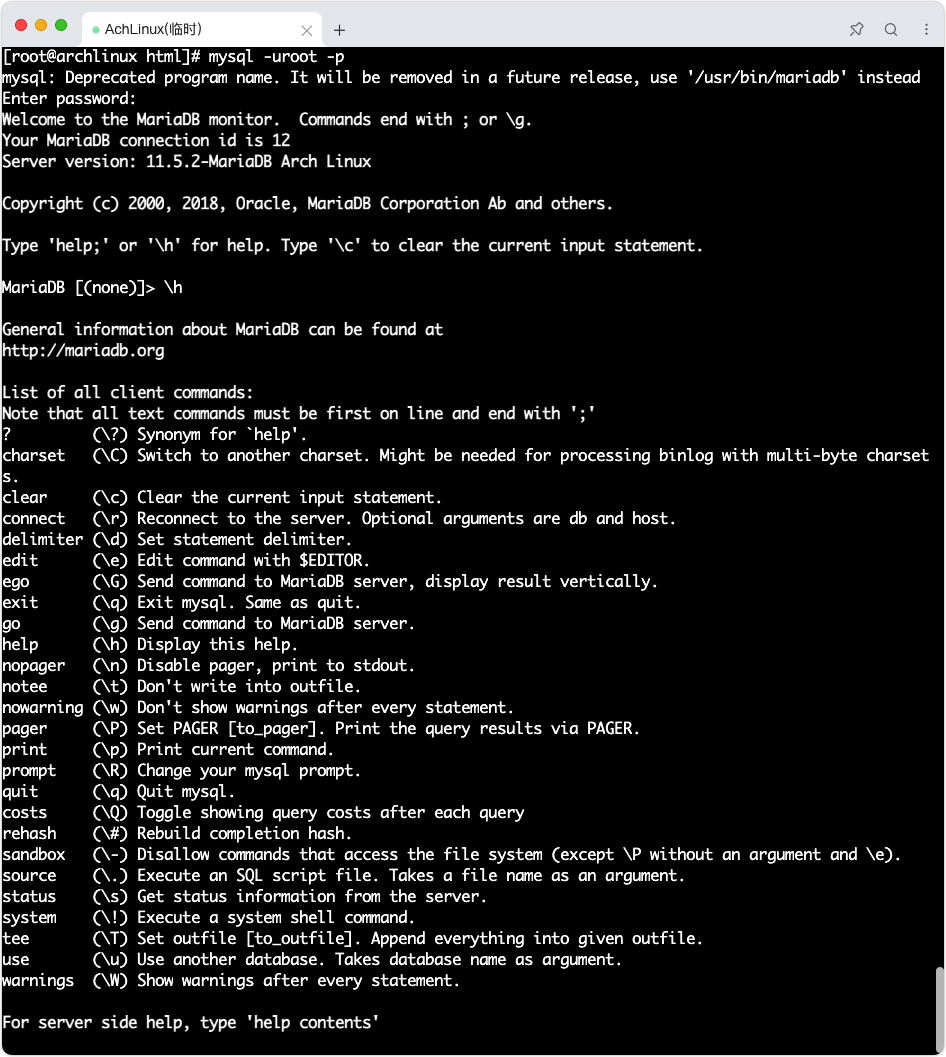
确认数据库也安装无误运行正常后,重启nginx、php、mysql
[root@archlinux html]# systemctl restart mysqld
[root@archlinux html]# systemctl restart php-fpm
[root@archlinux html]# systemctl restart nginx
通过部署phpmyadmin来测试一下,下面的代码清单是下载并解压phpmyadmin的步骤
[root@archlinux html]# cd /usr/share/nginx/html/
[root@archlinux html]# wget -c https://files.phpmyadmin.net/phpMyAdmin/5.2.1/phpMyAdmin-5.2.1-all-languages.zip
[root@archlinux html]# unzip phpMyAdmin-5.2.1-all-languages.zip
[root@archlinux html]# mv phpMyAdmin-5.2.1-all-languages phpmyadmin
[root@archlinux html]# cd phpmyadmin/
复制示例配置文件 config.sample.inc.php 为 phpmyadmin 的正式配置文件 config.inc.php。
[root@archlinux phpmyadmin]# cp config.sample.inc.php config.inc.php
[root@archlinux phpmyadmin]# vim config.inc.php
把里面的下面两项进行修改:$cfg['blowfish_secret'] = '';后面添加任意字符串,$cfg['Servers'][$i]['host'] = 'localhost';将localhost修改为127.0.0.1。
$cfg['blowfish_secret'] = '';
$cfg['Servers'][$i]['host'] = 'localhost';
结果如下:
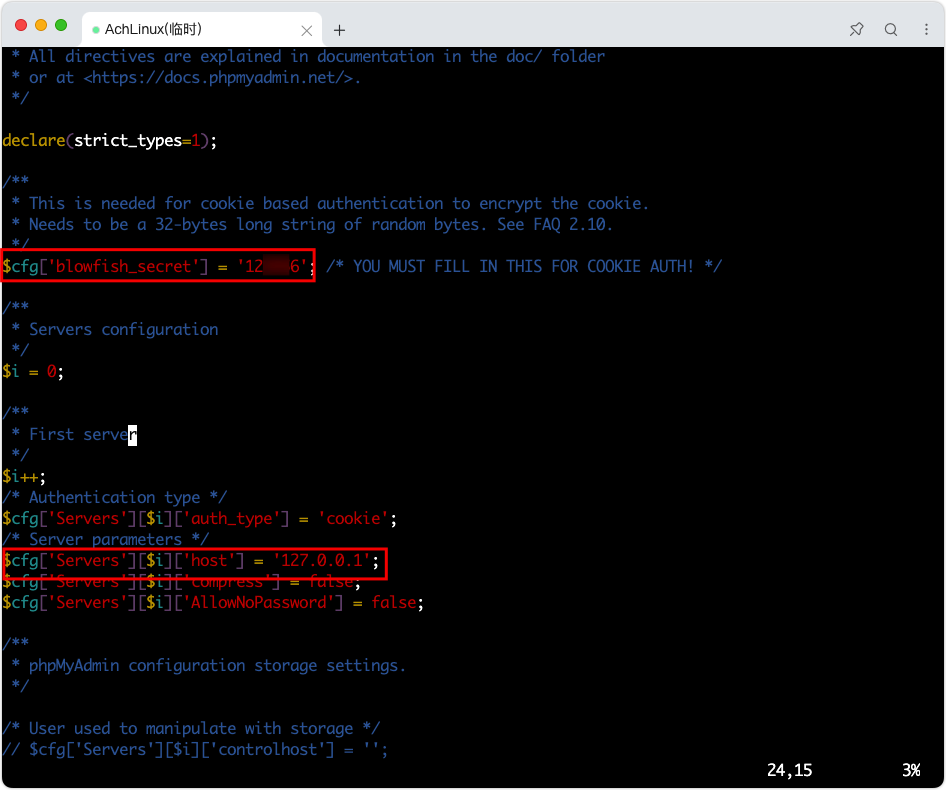
浏览器中访问测试,可以看见 phpMyAdmin 的登录界面。
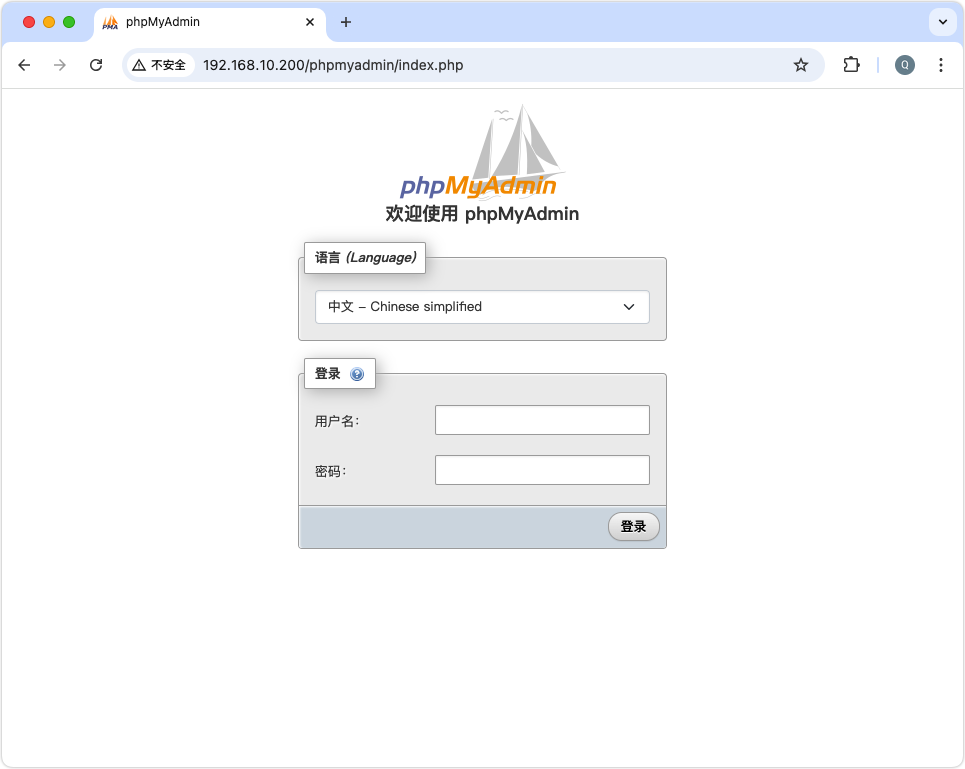
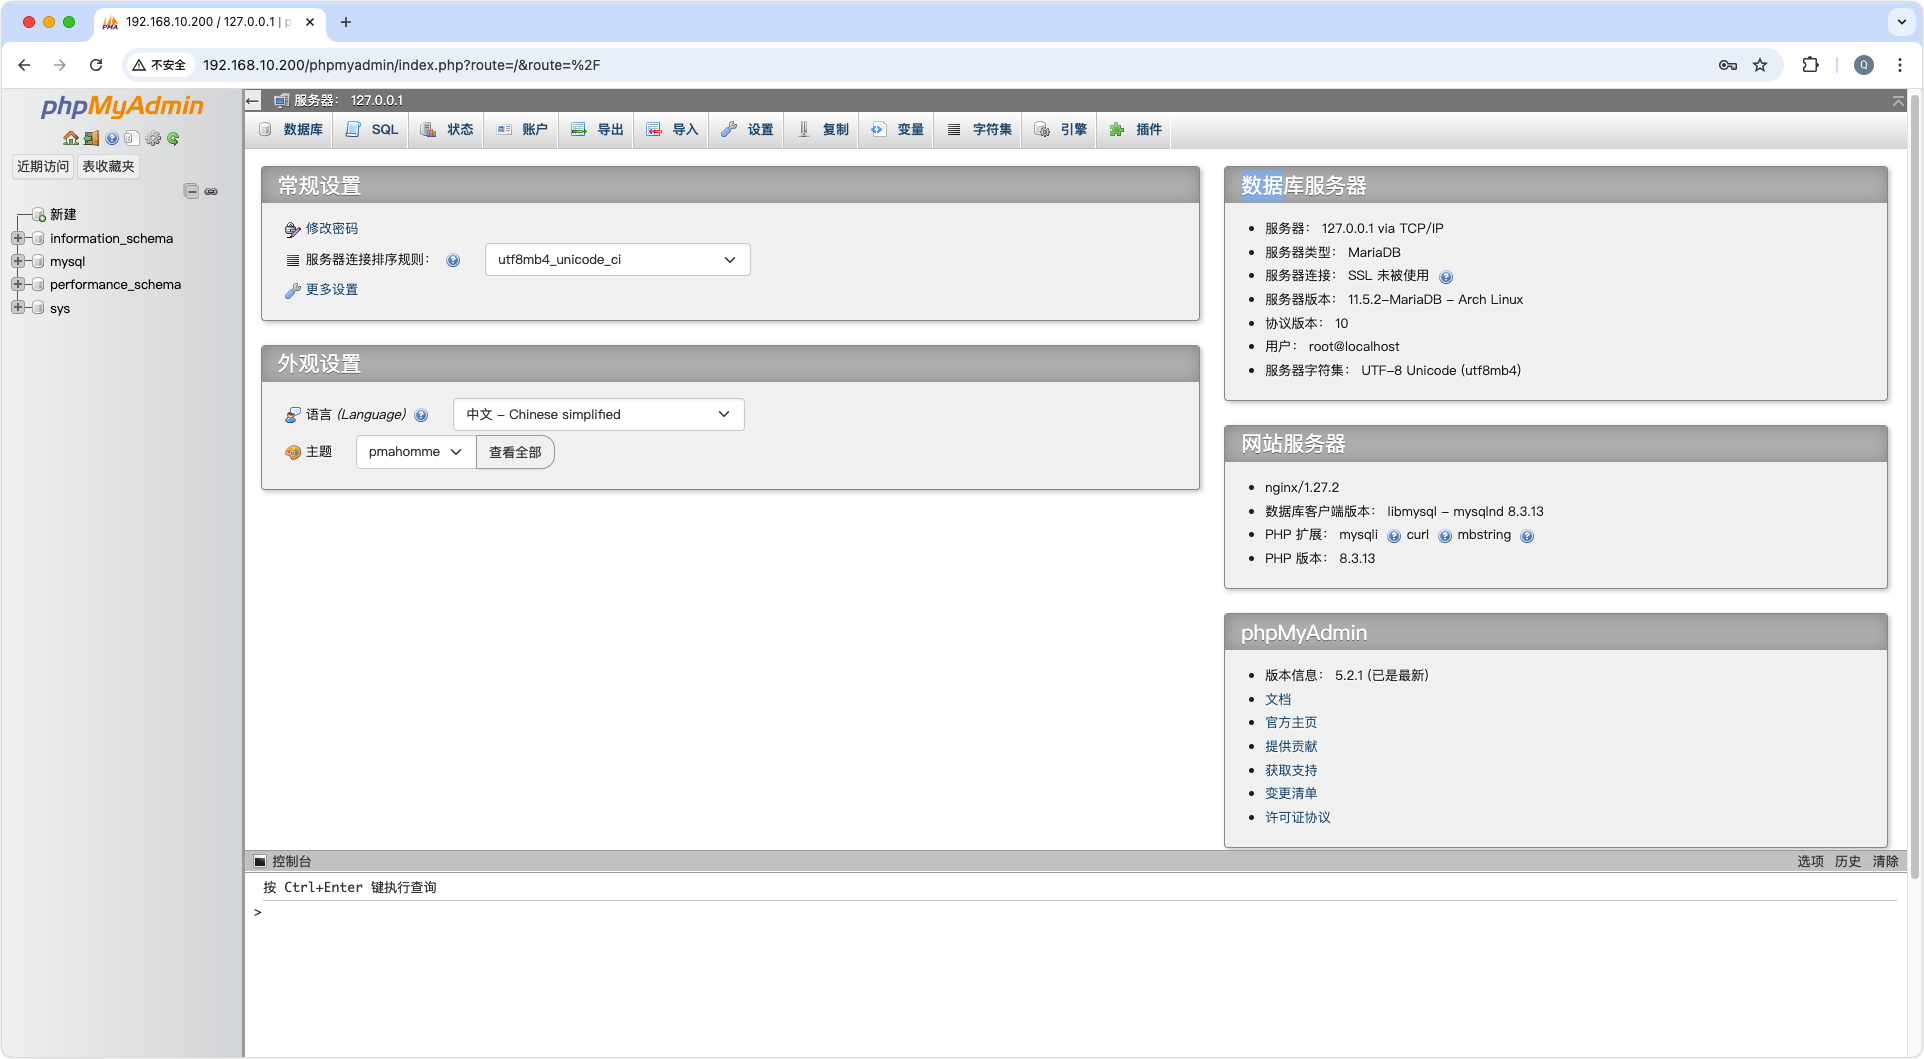
使用mysql数据库的用户名和密码进行登录,如果可以登录成功看到下面的界面,就表示LNMP的全部组件已经配置成功
Section 12.2: Installing LAMP on Ubuntu
安装的步骤与上面在arch里面安装的类似,仅包名略有不同而已
root@demohosts:/home/demouser# apt install -y nginx mariadb-server php-fpm php-mysql
配置关联的步骤参照arch的部署
Section 12.3: Installing LAMP stack on CentoOS
同样只是需要安装的包和包名的区别而已
[root@centoshost ~]#  yum install epel-release
[root@centoshost ~]#  yum install -y nginx mariadb-server php-fpm php-mysql
配置关联的步骤参照arch的部署